Friday, March 1, 2013

Relaxing Moisturizing Spa Bath at Home!

Hey Everyone!
Happy March, Happy Spring! :-) I'm so excited for Spring! Even though Florida doesn't have much season change, I'm still happy that it's closer to my favorite time of year. A lot of you probably live in cold areas where the rough winter weather can leave your skin dry, and cracked. That is one of the worst feelings! No one likes dry and rough skin, and I personally have super dry skin and mild eczema! Often times I find myself annoyed and frustrated with it. I'm going to show you one of the things I do to help with my dry skin. Every once in a while I like to deep condition my skin with products I have tested over the years, i've come to love.


Some of the things you will need are:

1. Oats
2. Honey (i'm using a random pack I found around the house because I ran out of my other one!)
3. Bath oil (NOT regular oil, this can clog your drain!)
4. Body butter, or body conditioner.


You should fill your bath with warm water, not too hot! Hot water can dry the skin even more, because even if you may not feel super hot water does slightly burn the skin. When your bath gets about half way start to use some of your selected bath oil.


I used Skin Therapy Oil from Coco Butter, it's only about $6- $8 and can be found at any drugstore. It does amazing things such as:
Helping stretch marks 
Helps fade scars
Help aging skin
Helps dry cracked skin
Promotes a healthy glow

This is an AMAZING bath oil, and can also be used after you get out of the bath as a lotion.


This oil has a very buttery texture, and its very oily. If you don't like that feeling of being very moisturized and even a little oily, I would skip this!


Another bath moisturizer I add is one from Avene


This helps with extreme dry skin, and you should use 2-3 capfuls mixed in with the water as the directions say on the back. This can be purchased online or at a dermatology office, and I'm unsure of the price but it shouldn't be more than $30. 


This has more of a creamy texture and really soaks into the skin. Compared to the Coco Butter Oil this doesn't leave any extra oil on the skin, but it does leave the skin feeling soft. 


Now you should add your oats, I used regular quaker oats and these can be purchased at any grocery store or convenient stores should sell them in some places. Oats help with dry skin so much and have much more amazing healthy benefits. 

Next you should add honey, I like to melt my honey a little in the microwave for about 20-30 seconds. After I've done that, I add a little water to get it to turn into more of a liquid, then adding it into the bath.

An optional step to this is using a body conditioner. I use one from Lush Cosmetics called Ro's Argans Body Conditioner. This stuff is truly amazing. 

Its very creamy, and leaves the skin feeling soft and buttery. This is $30 dollars from Lush, but they're pretty good about giving samples so ask to try it before you buy it ;-). This also smells so amazing! With an aroma of sweet cranberries. What you do with this is, after you've finished bathing yourself you apply this to your entire body and let it sit in like you would a hair conditioner for about 2 minutes or longer if you'd like. Then you wash it off, and it should leave you smelling amazing and with soft skin!

After you get out of the bath you can reapply your bath oil (if the directions say you can apply it to skin) or apply a thick and moisturizing lotion. 


I hope this leaves you feeling amazing! 
xox
Zuri Tibby


Wednesday, February 27, 2013

My current skin care products

Hey everyone! On my tumblr, i've answered loads of questions regarding my favorite skincare products. However, I change my skin care routine all the time and I like to keep you guys updated!


I'm in now way a doctor, and i have no idea how these products will react on your skin, but they do work for me, and other people i've recommended them to! Most of these products you can find locally, and almost anywhere, and are reasonably priced. 

Before you buy skincare products, I think you should carefully look at your skin type.

  1. Is it dry? 
  2. Is it oily?
  3. Is it oily and dry?
  4. Do you have breakouts frequently?
  5. Does your skin itch frequently? 

These are some of the questions you can ask yourself before buying skin care products. Not everyone has the same skin, therefore not every product works for everyone. As for myself, I have dry skin, but slightly oily on my nose, and its very sensitive most of the time. The main thing in my skincare necessities is a great moisturizer. 

CLEANSERS


These are some of the cleansers I use for my face, they are all from Lush, and range from $10- $15, depending on the amount you get. Two of them are the same (Buche de Noel) but I just thought including two of them made the picture look nicer ;-).


  1. HERBALISM 
Herbalism is the green cleanser, and its targeted towards oily, and problem prone skin. Even though I don't get breakouts often, I find that this helps me prevent them and helps the skin on my nose be less oily. 

Apply some on the back of your hand, and add a little bit of water.

Mix the water and the cleanser together.

As you can see, the consistency is very creamy, and this cleanser is great and melts into the skin. Despite its smooth appearance, it really does exfoliate your skin and get rid of dirt and dead skin cells! This clears up all of my breakouts and is great for people with oily, and problem skin - but can be used for all skin types. 

2. Buche de Noel 

Do the same thing as you do with Herbalism! 


This is a more bumpy cleanser, still creamy but exfoliates a little bit more. This is for all skin types and helps with anything. I still recommend the Herbalism for anyone with oily, and acne prone skin. 


MOISTURIZERS


Like I said before, I have more dry skin. This is a very important part of my skin routine. Usually, I skip using toner, but if I do use a toner I use the Clinique purple toner for dry skin after I cleanse my face and before I moisturize. 

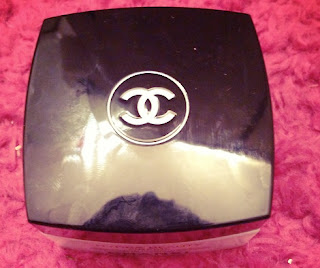
1.   Light Moisturizers... Chanel and Avene. 
This moisturizer is a great one. I love the scent of it. I go for this more in the day time,  when I want a moisture, without making my face too shiny. If you have oily skin, I would recommend the gel instead of the cream moisturizer.
About $60 - $80, depending on where you buy it. Can be found online, or at a department store. 

This is another great light moisturizer, I take this one when I travel a lot,  and  I also carry it in my purse sometimes! This is great for people with sensitive skin because it has no scent and the ingredients should not irritate the skin.
About $20 - $35, can be found online or at a dermatologist. 

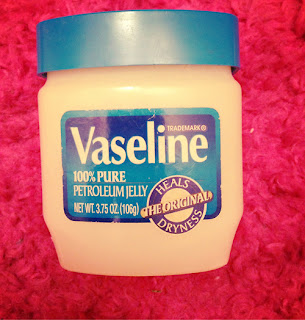
2. Thicker moisturizers... Rosebud salve, Vaseline, Avene. 

This is another great moisturizer for on the go, I always carry this in my bag. The great thing about this is that it's multipurpose and you can use it anywhere. This is a very thick moisturizer, and I would recommend wearing under makeup, or when you live in a very cold area in the winter time. Applying too much can make your face very shiny! This has a great smell, and it great for people with sensitive skin and dry skin.  About $4 - $6, can be found at Sephora, or Urban Outfitters. 


This moisturizer from Avene is one of the best. I love using this at night time. Overnight this really soaks into my skin, and when I wake up my skin appears fresh and healthy. Sometimes when I get a pimple, I have hyper pigmentation. This means that even if I don't try and pop the pimple or scratch at it, it still turns a little darker on my face and will sometimes leave a scar. This stuff helps with that so much! It gets rid of any acne scarring you may have, and moisturizes the face. Great for people with acne scarring, and dry sensitive skin.  $20 - $40 depending where you buy it, online or at a dermatologist. 


This is such an old product, I feel like everyone will have. This can be used as anything, kind of similar to the rosebud salve. Vaseline can be used on any skin type, but if you have more oily skin, I would say that you should use it in moderation so you don't appear too shiny. This can be found from 3$ - $6 depending on where you live, from any drugstore. 


Thanks so much for reading this post! Stay tuned, and I may be doing a giveaway on some of these products soon ;-) 


xox 
Zuri Tibby 


Sunday, February 24, 2013

What to do at a photo shoot?

Hey everyone!
A lot of people that follow my tumblr are people aspiring models, fashion enthusiasts, models, etc. One question I get asked a lot is "How do you know what to do during photo shoots?" Well, on my first photoshoot with my mother management I was very timid in front of the camera, and needed tons of direction from the photographers.  Even though I'm still new in the industry, I have a better understanding of what my best angles are, and what flatters me the most - I still have some improvement to do, and i'm not perfect but I try my best! :-)

First Test shoot                                                                          Second Test Shoot 


In the first picture, even though I like this picture of me, my face doesn't show too much emotion - compared to the second picture, its much more interesting, and I places my hands in a way that enhances the photo more. Theres more intensity in my eyes, and it looks like I put more thought into the posing of this picture.        

Tips on how to improve skills in front of the camera

  1. Practice in front of the mirror - make different faces (surprised, sad, happy - start with the basics first). 
  2. Think about something that evokes emotion - if you want to look 'fierce' in a picture with intensity in your eyes, think of something that makes you angry - but don't over do it
  3. Move - Doing this in front of people may be awkward at first, because you don't know what works, and what does work. Thats fine! You have to experiment with angels and figure out what looks the best for you 
  4. Look at models in magazine - study their facial expressions, and the way they move their body. You can also look at behind the scenes footage of photo shoots on YouTube, and watch the model in motion. 
  5. Don't be afraid to step out of the box - if you don't feel like you're bringing out enough in your face, try to laugh (don't worry about looking weird! Laugh as much as you want, to bring out a genuine smile, think of something funny!) Even screaming is okay, there are tons of pictures where models are screaming and some have even made covers! 
  6. Take advice from the photographer - If the photographer tells you to move, or look another direction, don't hesitate. He/She is not trying to insult you, they are trying to help you look as best as you can! 
Thats my two cents on being in front of the camera, and improving! Hope this helps!
xox
Zuri Tibby 

Thursday, February 21, 2013

Protein banana bread/ cupcakes!

Hey everyone!
I know I've been doing tons of recipes, but I promise I will be posting more fashion posts, and vlogs soon! Once I'm in NY again I will definitely do that! Today I was experimenting and I made a recipe for protein banana bread / cupcakes. These are good for an after workout snack, or can be good for a part of your breakfast. There is only 220 calories in the batter, which means its very low calorie per cupcake.

Ingredients and tools needed:


1. Mixing bowl
2. Pan, or cupcake baking pan
3. Egg whites (you can separate the yolk from the egg white
4. Almond milk
5. 1 Ripe banana
6. Non stick spray
7. Cupcake pan liners
8. Oven (duh!)
9. Timer
10. Cinnamon (optional)
11. Nuts and Raisins (optional for those with nut allergens).

Step one:
Pre-heat your oven to 350 degrees.

Step two:  Mash banana into the mixing bowl.
Step three: Add one cup of oats to the mashed banana.

Step four: Measure out 1/4 cup of egg whites and add to the mixture, and mix together. Should look something like this:


Step Five: Add one cup of almond milk and mix


Step Six (optional): Add cinnamon 


Step Seven (optional): Add Nuts, and raisins, and mix together.


Step eight: Spray nonstick cooking spray onto the pan with the cupcake liners.


Step Nine: Measure out the batter into a spoon, and place into the liners in the pan until you fill each section. (if you're using a pan to make banana bread, you can just pour the batter evenly into the pan until it's full).


Step ten: Carefully place them into the oven, and bake for 15-20 minutes.

When there done they should look something like this!


Allow 5-10 minutes to cool! Enjoy!! 

xox
Zuri Tibby 

Wednesday, February 13, 2013

Healthy Protein Banana Pancakes!


Happy (belated) Pancake day!
Hi everyone! I meant to do this post yesterday, but it was my first time making the pancakes and they came out HORRIBLE! They weren't even pancakes it was just cooked batter on a plate with no shapes... I didn't even eat them! I attempted this for a second time and they came out great! These pancakes are super low in calories, low fat, and high in protein. They're super tasty as well! All you need are 2  key ingredients, and a couple of optional ingredients that add to the flavor.

Ingredients:
1. Eggs (egg whites work better!)

I took the yolk out of my eggs. 


2. REALLY Ripe Banana
I froze mine for a week, and defrosted it this morning. 


MATERIALS NEEDED:
1. Non-stick surface to cook on... I used a skillet.
2. Bowl to mix with.
3. Fork to mix, and mash bananas.
4. Spatula
5. Large to medium cooking spoon

INSTRUCTIONS:

1. Preheat your cooking surface, I cooked mine on a medium low heat. Since bananas cook very fast, cooking too high may turn the pancakes very dark to appear burnt. (If this happens don't worry! Its normal and tastes just as good!)


2. Peel your extra ripe banana into your bowl (this should look gross!).


3. Begin to mash banana with your fork, or whatever you chose to use that does that job!
Gross looking! 
4. Add your egg or egg white into the mashed banana in the bowl (I used egg whites and removed the yolk of my eggs).


5. Start to mix the egg white (or egg) and mashed banana together, until it looks something like this:


6. Option to add extra flavor.. I used Apple pie spice (because I was out of cinnamon!)


Mix thoroughly 

You should have something like this so far. 


7. Now your cooking surface should be hot, Take your cooking spoon and measure out the size of your pancakes. Be careful not to make them too thick, this will burn them and make them harder to flip!


Should look like this!


8. Evenly place the batter onto your cooking surface.


Should look something like this, unless you have a smaller pan or cooking surface which is fine! Add them one by one if you use a smaller non-stick cooking surface. 


9. Once the pancakes start cooking, take your spatula to test if they are ready to flip over. Take the spatula on one corner of the pancake, and if it moves with out messing the rest of the pancake up - its ready! Another way to tell is by seeing if there are little bubbles at the top - this means the other side is cooked and they are ready to be flipped!

9. Start to flip the pancakes, making sure they are cooked on each side.

10. When you're done they should look something like this!

Mine struggled some... :)


10. Option to add Peanut butter, or strawberries like I did!

Here is what mine looked like:


I hope that yours came out as good as mine did!! Enjoy!
xox
Zuri Tibby.

Friday, February 1, 2013

What do models wear to castings? What can you wear to meet with an agency?

Hi everyone!
Another question I get quite a bit is regarding what models wear to castings, and also what to wear to meet with an agency. To castings, I like to wear things that are both functional and cute. Something that shows my style, but isn't too distracting from my face. Though these outfits i'm about too show you aren't too fun, you have to remember it's always important to remain professional when going to a casting or a meeting - Modeling is a job!  A good thing to base your out fit off of is a black or white tank top, and skinny jeans.  This is something this is so versatile and serves as a base for countless outfits. If the at the meeting for an agency, or a casting, someone asks you to take off your shirt for polaroids the black tank is a life saver. Many times casting directors or agencies will do this so they can see your body more in a picture and its not so covered by what you're wearing. Skinny jeans are great because they show your figure off on your legs, if you want to appear taller try for tight fitting jeans with a little flare at the bottom, this will help elongate your body. I'm going to show you 3 outfits based off a tank top and skinny jeans - appropriate for castings and meeting with an agency.

This black tank I got from Forever 21.
The skinny jeans in the picture below are from a brand called UNIQLO.

Any basic skinny jeans will be fine! 

OUTFIT ONE
I kept the same base (the black tank and the skinny jeans) but added this silk shirt from H&M (they don't have this style anymore but I linked to a similar one available in other colors).

OUTFIT TWO
Keeping the same base, I added a simple colonial inspired top from Forever 21. The link will send you to similar tops. 

OUTFIT THREE 
Keeping the same base, I paired the skinny jeans with this floral top I got from Zara

As for shoes go, I would just keep it simple with a pair of black or nude ballet flats, or you could spice it up and wear combat boots. I would also bring a pair of heels just incase they ask you to walk at the agency meeting. Don't be nervous! Be yourself and smile! Don't be shy, and be sure to talk to them and be confident. Good luck! 
xox 
Zuri Tibby